Thursday, May 26, 2011

Adding a little color

First off, welcome to any lovely Trac Changes followers who found me through Rachel's blog!

Now on to my color problem.

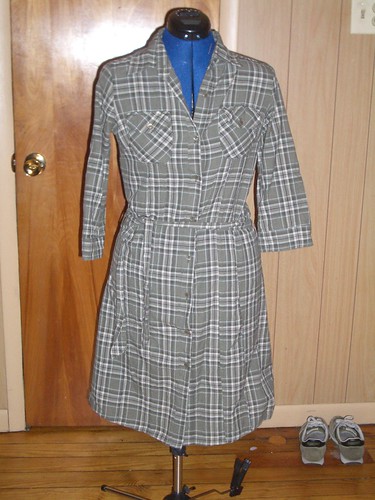
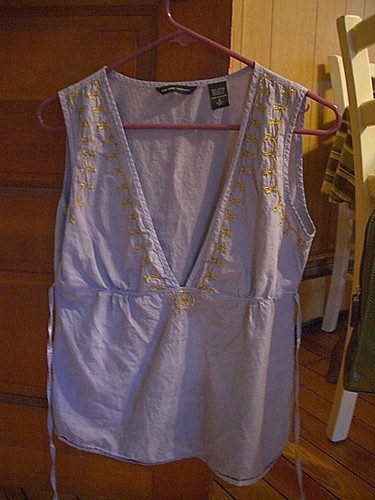
Don't get me wrong, I love a good white blouse. Crisp whites are so lovely, especially in the summer. At some point, it was at a picnic I believe, I spilled some barbecue sauce on this beautiful white sleeveless tunic:

Mediterranean blouse

It is hard to see in this picture, but there is a little yellowish spot on the right side under the "sun." (In my kitchen, everything has a yellow tinge to it, but it is the best lighting in the house for pictures.)

kitchen rug

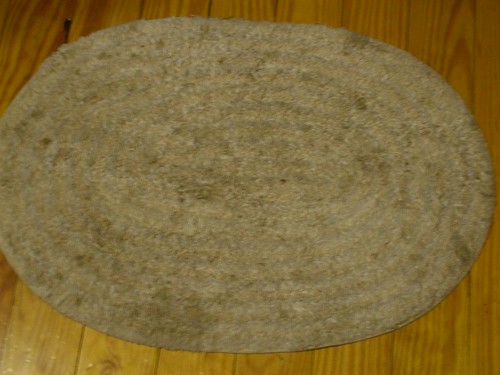
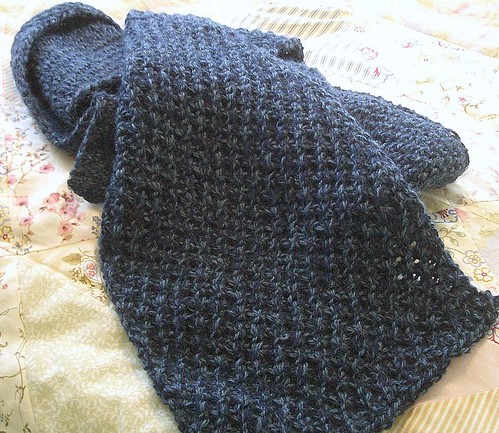
I've also had this nice little kitchen mat for about 4 years. No matter how much I cleaned it and sprayed it with stain remover, the dirt from feet would not go away.

Thank Heaven for RIT Dye. (And inexplicable clearances! I bought this Navy Blue for $0.45 one day at the supermarket.)

The instructions were simple and the results were fabulous.

Mediterranean blouse2

(I promise, a pic is coming soon with me actually wearing it.)

kitchen rug2

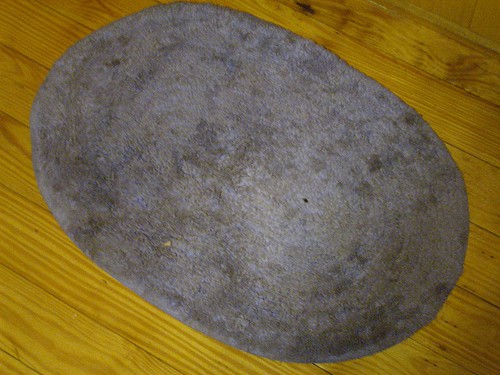
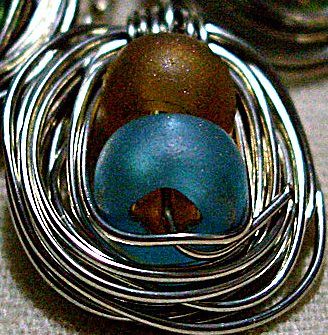
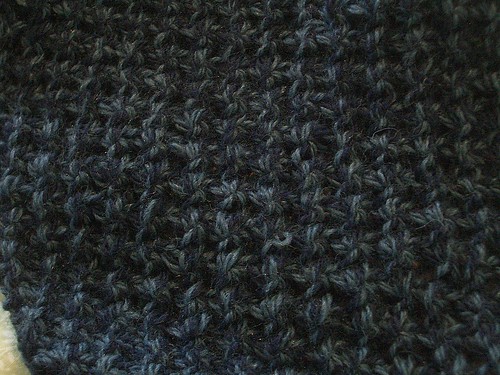
And well, it stills has some dark spots, but they don't look like dirt so much as a change in saturation of color. I'm pleased with it. It goes with our blue glasses, too!


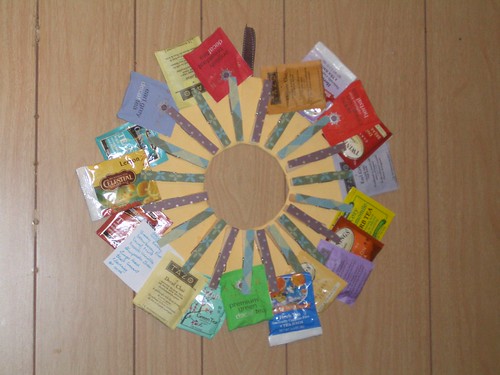
I think I've becoming addicted to dyeing... You can check out my forays into dyeing yarn with tea and kool-aide here on Flickr, or here if you are on Ravelry!

Thursday, April 21, 2011

Rosie Riveter Dress

Rosie Riveter


I don't know why, but this dress reminds me of Rosie the Riveter. Maybe it's the plaid. I bought it for under $5 at the Salvo (see below). All it really needed was a higher hem line and a better belt. I found the belt on clearance at Wilson's Leather for $6 and I can use it on other outfits.

Technically, I believe this fits into my "Make it Work" challenge because I bought the dress and belt back in December and just never got around to it until now.

Rosie Riveter 1

Wednesday, March 30, 2011

Make It Work Challenge

I've been doing some thinking. Lately, I feel like I'm too busy to make my own clothing many times, so I scrounge for clearance items and sales instead. Often, I think I find something, but after only a few wears of the item I realize that the sleeves are too tight or the buttons pop, or it is shabby quality, etc., etc.

I don't have an easy body to shop for. Which is what I love the most about sewing. Which is why I have a drawer overflowing with fabric and 2 dozen patterns. That I haven't been using!

I've also been stuck in a materialistic rut of sorts. I think the solution might be to lock down my clothing budget to a minimum and to force myself to create with what I have on hand.

So, I'm starting a Make It Work Challenge for myself and anyone who wishes to join me. I've seen others out there do something along these lines, and I love it.


[Incidentally, I'm fairly certain I used this book in 4-H when I was learning to sew.]

Here are my rules:

1. Avoid buying new clothes. Force myself to get creative and savvy. Besides anything I make will fit so much better. This will also force me to improve upon my seamstress skills. Maybe I'll finally take that leap and sew my own swimming suit (one of the most difficult garments for me to find).


2. Avoid buying new fabric or patterns. Use up that stash! Save your JoAnn's coupons for quality notions and all the thread you'll be needing.

3. If I MUST buy a garment, get rid of something! This will help me get rid of the old, worn out clothing and help keep garment clutter to a minimum. I can either donate, or use the fabric to make something else.

Not only will this improve my wardrobe and barely effect my wallet, but it will keep me blogging. And if you don't see posts from me, bug me! Let's work together to keep each other crafting.

And hopefully, this whole project will make me more thankful for what I already have.

I'm in for a year, how about you?

Monday, January 24, 2011

Birthstone Nest Pendant

Finished nest pendants


You may well remember back when I tried to duplicate the ~Ruffles and Stuff~ Family Tree Brooch/Pendant. The gift was well received, but I thought that the tree was a little too big especially for the petite women in my family that I wanted to give it to for Christmas.

So, I put my thinking cap on. And maybe it is because of the name of my blog, but I thought of bird nests and using the beads as eggs! I'm sure it's been done before, but even so I thought I'd share with you how I did it.

Supplies
Nest pendant supplies

Ignore the glue gun! That was a proto-type. Hot glue and wire don't work together, it seems. However, you will want to gather:

-Wire cutter and needle-nose pliers
-Beading wire in your choice of metal
-Chain necklace
-Beads in the children's birthstones (Pictured here are Peridot/August for myself and Aquamarine/March for my brother)

I bought the beads at AC Moore. They have a large selection of beads in plastic tubes that are decently priced.

First, I strung on the the two beads onto the end of a piece of wire, and started coiling the wire around. If you look closely at the bottom of this picture, I think you'll get what I mean:

Nest1

I continued that until I felt the nest was big enough. Then, I brought the wire up to the top of the nest and wrapped it around the nest a few times and then looped it through a chain on the necklace before snipping it and tucking it in.

Voila! Easy peasy.

Monday, December 6, 2010

Adelaide

I promised some sewing posts, and here I am to deliver. This dress has been a long time in the making.

Adelelaide dress

Guess how much she cost me?

$4.00 for fabric on the last day of the 4-H fabric sale
$1.00 pattern (Jo-Ann's sale)
$2.00 for interfacing
$3.00 for thread

Comes down to a total of $10 for a tailored dress. Not bad. :-)

I've wanted a red dress for the longest time, and now I have one.

Before I go, I just wanted to share a close up of the pleated sleeve. I love these kinds of sleeves. McCall's did a nice job with this pattern.

Adelaide sleeve

Next up, my pleated purse with a customized liner.

Sunday, October 31, 2010

Harvest Tortellini Soup

October is a wonderful month. The leaves look gorgeous, and the weather is nice and crisp. And my allergies attack my poor little sinuses until they give in to a full fledged sinus infection. I try every year to fight it off, but the infection comes with out fail. Its a good time to enjoy soup. And boy have been enjoying soup in this house! We have about four different kinds in the freezer at the moment.

Garden Tortellini Soup

This recipe is one that I just whipped up at the beginning of the month to use up what was left of my tomatoes. In late September, I pulled all the green tomatoes and put them in a big, brown paper bag in a cool dark spot. I wasn't sure it would work, but they actually ripened. And not so quickly that they rotted, either!

Then, when they were ready. I peeled and sliced them. If you haven't done this before, it is surprisingly simple! It was my first time trying this, and I was pleased. Bring a large pot of water to boil, with a dash of salt. Then, dunk the tomatoes in for 30 seconds and place them in a large bowl. Do not put them in cold water or on ice. Just let them cool. The skin peels off so easily!

Ok, now, to the recipe. As usual, I made this "dutch" so you could alternate it as you like.

I used:

About 10-12 medium sized tomatoes, peeled and cut into medium pieces
Large handful green beans (frozen or fresh)
Large handful sliced carrots (frozen or fresh)
1 whole zucchini, sliced
2 cans Veggie broth
Half cup of chopped onion
About 6 oz. of cheese tortellini*
Olive Oil
Shake or two of preferred Italian spices, to taste**

*I actually used a little more than half of a 12 oz. package. If I don't stuff the soup with tortellini, Ben will put all the tortellini in his bowl, and I will get about three. :-)

**My spice rack actually came with a jar of Italian spices that contains basil, thyme, oregano and marjoram.

First, I cooked the veggies in the bottom of a large pot with olive oil and spices. I added the tomato last...about right when the rest of the veggies were ready.

Then, I added the broth and brought it to a boil. Once it was boiling, I simmered it for about 20-30 minutes until heated throughout. You can add a teaspoon or two of tomato paste here, to thicken it if you like.

That's all folks! Goes great with tuna sandwiches. :-)

Monday, September 13, 2010

Summer projects

Most of the summer I spent holed up in my bedroom (the only room with sufficient A/C). Even there, it was too hot to work on my biggest project most of the time. I was working on this wonderful knot-pattern scarf for my father-in-law's birthday in August. Sure, August seems like a strange time to give someone a thick, wool scarf. But it was my husband's idea (and he was so very excited about it), and well, he won't be receiving the scarf at Christmas after the ridiculous Lake Effect snow has already begun. My FIL was very pleased with the gift and said he looks forward to using it the next time his snow blower breaks in the middle of a blizzard. Hehe.

I called it the Mariner's knot scarf because he really likes to take his boat out on the lake with the entire family.


Mariner's Knot Scarf

Here's a close up of the knot-pattern:

Mariner's Knot Scarf

The knot was a little difficult to work with at first. If you use this pattern make sure to make all of your knit rows loose! Otherwise you won't be able to get the needle through three stitches three times in the next row. Once I figured that out it was a breeze to knit.

Also, for the cast-on method I found this video very helpful:


She goes nice and slow so you can actually see what she's doing. :)I like this method for casting on bigger projects. Once I learned it, it went by so very fast! Though I did not do the correlating bind-off, and you really couldn't tell.

My other project, when it was way too hot to knit with wool was this neat little tea wreath:
Tea Wreath
(Please excuse the glare... the lighting in our home is a bear to work with).
I had been trying to come up with a better way to offer the variety of tea I have to guests. Flinging open the cabinet always kind of intimidated them, and all the tea was high above the stove. Kojodesigns solution works out perfectly. I put the rest of the tea bags in little baggies in a drawer. No more boxes filling up my cabinet! Which is nice, since our kitchen is very organizationally space challenged.

Ok, I've rambled on enough. I am working on some Christmas projects that I'll have to wait to share. But I also just got a dress-form, so look forward to some sewing projects coming up!