Showing posts with label challenge. Show all posts

Tuesday, May 29, 2012

Frankinsteined Paisley Purse

Since I've learned to sew, I have been known to be difficult. My mom and former 4-H leader can attest to this. As a novice sewer, I did not want to do the novice project, a tote bag. I felt that I had already mastered those basic skills and I wanted to make a dress. So, for my first year in 4-H, I sewed a dress.

{Picture to come?}

This determinism and stubbornness later came to manifest itself in a desire to alter patterns. I wanted that dress body with that dress sleeve and so on and so on.

At one point I convinced my 4-H leader that I could make a lined dress sleeveless (the seams of the lining would been inside the sleeve) and we were able to figure it out.

As it turns out, this strange determination and desire to do things differently worked out for me. When I sewed my Adelaide dress, I had to do some major reconstruction to the bodice in order to accommodate my body type. And in truth, I really enjoy the challenge.

Now, this purse didn't need any changes, however, I really liked the tab style band of bag B, but didn't want another large tote, so I used the band and straps of bag B with the body of bag D.

(My pattern says it is 0578, but it has snowflakes on it, so I think it was at one point a holiday special or some such business. 2685 is the number you would look for on the Simplicity website or at your local big box store.)

In fact, the reason I had set out to sew my own purse in the first place was because my three options have been:

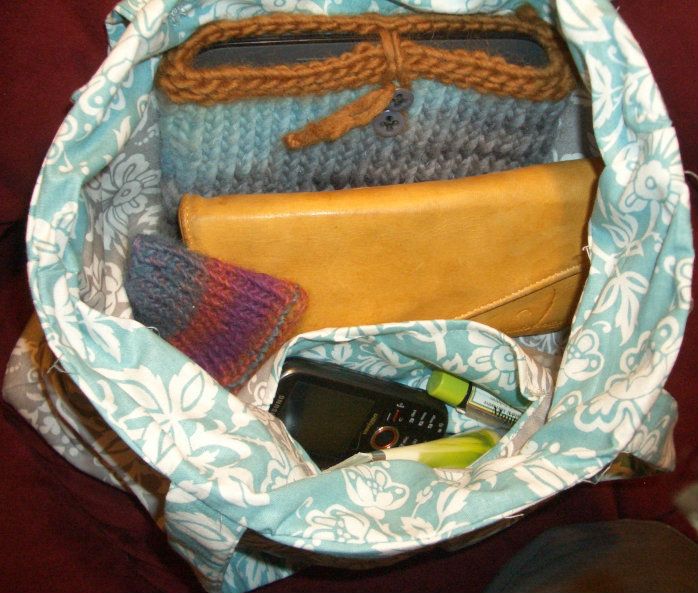
-A hand knit and felted wool bag that has simply been too hot for the warmer months.
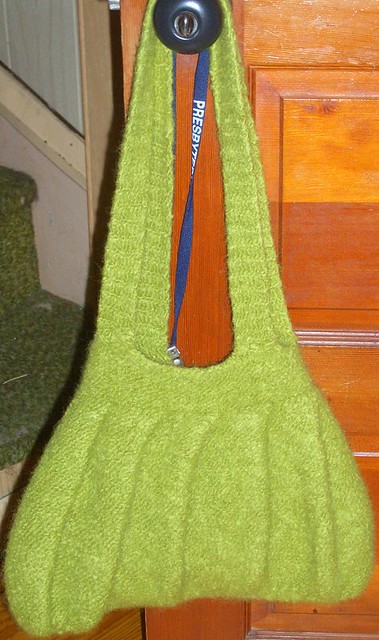
-A large brief-case type bag that I got for trips so I could easily carry my netbook with me. Since it has warmed up, I've been lugging this around everyday.

-And a small clutch that won't even allow me to carry the gorgeous deer-skin wallet my grandparents gave me from a deer my grandfather had shot.

I needed something light and medium-sized for the summer. So, I set to work.
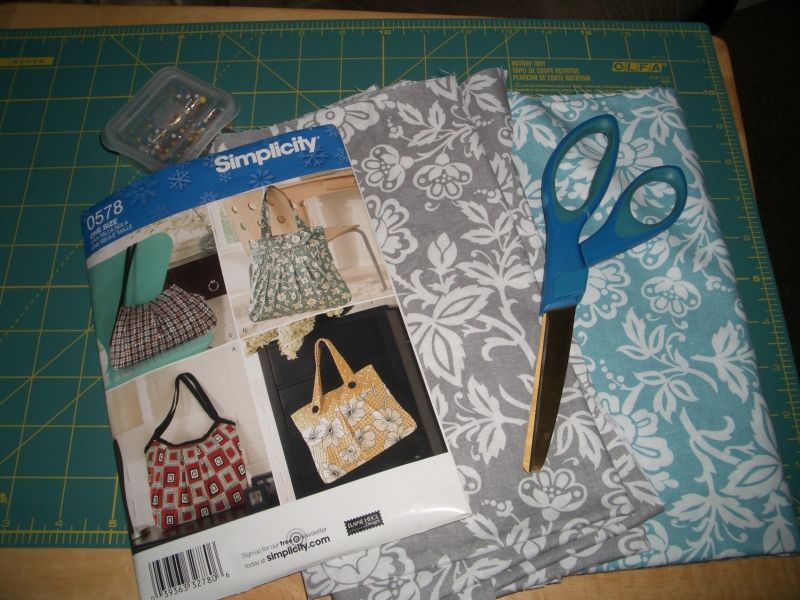
I chose to do a similar fabric pattern in contrasting colors.
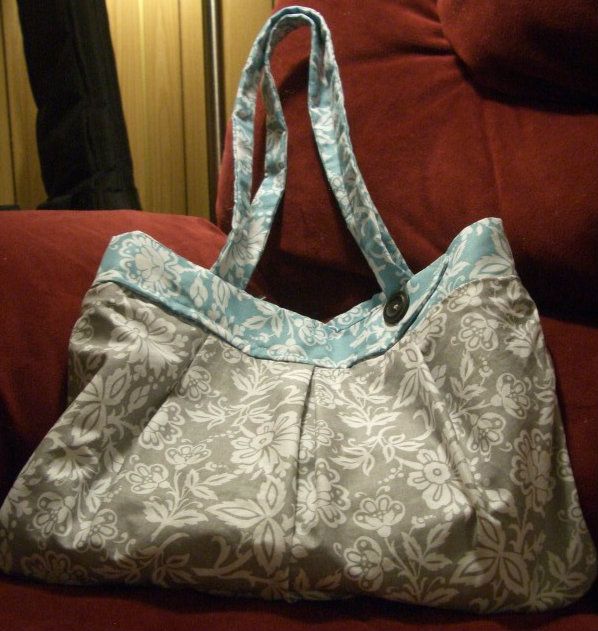
All in all, I think it worked out well. You can't see it well here, but the tab isn't quite right. The top of the "arrow" is cut off, but that has nothing to do with grafting the two bag pieces together. I read and re-read the instructions and I can't see how they do it as indicated in the pattern without cutting off the top of the arrow like that. There really wasn't enough of a seam allowance to make up for what is lost in turning the band and band lining. There was one other point in the pattern where I read it over and over again and couldn't understand how they were accomplishing what they were indicating. So, I just trucked on and made do.

The only other change I made was to do away with the inner pocket zipper. Instead, I made the inner pocket the contrasting color and sewed it so that a little bit of it would be peaking out as a trim around the pocket.
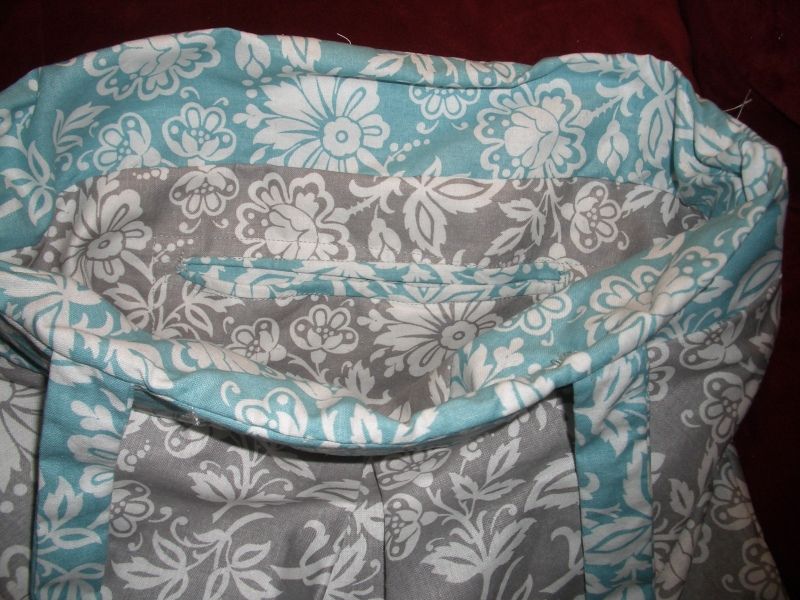
(Please excuse the threads peaking out. I did trim those after taking these photos.)

And it is the perfect size for all my everyday needs.
Wednesday, October 26, 2011

Failures and Triumphs

Wow, it has really been a long time since I've updated.

First off, I have failed my own challenge. I did make one top and one dress. The button on the top fell off after one wear (and I'm not much a fan of it, anyway) and the dress is lovely. But I have yet to procure photographic proof. I'll get on that.

Also, I wound up buying more fabric. With a garment in mind....but I've hardly made a dent in my current stash. I did manage to weed out the "grandma fabrics" as Ben so lovingly calls them and plan on donating them to my local 4-H for their fabric sale. (Ironically, I'm fairly certain that I bought most of those fabrics at the 4-H sale.)

And the last bit of my failure is that I bought a few sleeveless blouses in the summer. The A/C in my car was dead and we were in the middle of a heat wave. The best option, it seemed was sleeveless blouses with a light short-sleeved cardigan for the office. That way I wouldn't completely melt on my way home. I simply didn't have the time, but I did however, have a 30% off coupon for Kohl's. And I did end up mending what I bought to fit me right.

Now, that isn't to say that I haven't been crafting away.

I am especially proud of this tea tray that I customized for my dear BFF and her new husband. They are both music geeks, even more so than I. (In fact, the groom was a member of the YellowJackets, who are doing a smashing job on the Sing Off right now. You should really check them out.) And they love tea. So I wanted to make them a literal tea tray that featured their love of music.

Photobucket

Photobucket

The tray is from Target and beautiful as is. I printed out some favorite musical pieces, soaked them in tea, and baked them a little. Then I tore them, laid them out and Mod Podged the heck out of them.

Photobucket

They were ecstatic. I failed to photograph the finished product myself, so I borrowed the bride's own picture.

Now, I shall get back to my Christmas present knitting (I am as pleased as a peacock, but I can't show off!) and pattern design testing. I also have some painting projects underway that I should be able to share soon.

Wednesday, March 30, 2011

Make It Work Challenge

I've been doing some thinking. Lately, I feel like I'm too busy to make my own clothing many times, so I scrounge for clearance items and sales instead. Often, I think I find something, but after only a few wears of the item I realize that the sleeves are too tight or the buttons pop, or it is shabby quality, etc., etc.

I don't have an easy body to shop for. Which is what I love the most about sewing. Which is why I have a drawer overflowing with fabric and 2 dozen patterns. That I haven't been using!

I've also been stuck in a materialistic rut of sorts. I think the solution might be to lock down my clothing budget to a minimum and to force myself to create with what I have on hand.

So, I'm starting a Make It Work Challenge for myself and anyone who wishes to join me. I've seen others out there do something along these lines, and I love it.


[Incidentally, I'm fairly certain I used this book in 4-H when I was learning to sew.]

Here are my rules:

1. Avoid buying new clothes. Force myself to get creative and savvy. Besides anything I make will fit so much better. This will also force me to improve upon my seamstress skills. Maybe I'll finally take that leap and sew my own swimming suit (one of the most difficult garments for me to find).


2. Avoid buying new fabric or patterns. Use up that stash! Save your JoAnn's coupons for quality notions and all the thread you'll be needing.

3. If I MUST buy a garment, get rid of something! This will help me get rid of the old, worn out clothing and help keep garment clutter to a minimum. I can either donate, or use the fabric to make something else.

Not only will this improve my wardrobe and barely effect my wallet, but it will keep me blogging. And if you don't see posts from me, bug me! Let's work together to keep each other crafting.

And hopefully, this whole project will make me more thankful for what I already have.

I'm in for a year, how about you?

Monday, April 12, 2010

Sticks & Stones Scarf and the Dread Pirate Gloves


My husband likes different. And I can't blame him. I wouldn't want a plain old boring black pair of gloves and scarf either. And that's mostly what is out there for men. But this past winter was freezing, and even winters before I couldn't bear seeing him go out without a scarf and gloves. So we picked out this fun (yet subtle) Sticks and Stones yarn by Caron Simply Soft Paints.

I started with the scarf, the basic Ribbed scarf pattern from Deb Stoller's book. I opted to use size 13 US needles instead to give it a kind of lacy openwork kind of feel and made it plenty long for him to wrap around several times.

Sticks and stones scarf


Then he asked me to make gloves. His scarf was only my second project, so I said, wait and we'll see. Everyone I had ever talked to said to stick to mittens or fingerless gloves. Gloves sounded horrible! Well, here's a little thing about me. I don't tend to stick to what people recommend and I always like a challenge. So after knitting the booties (see previous post), I was ready to try something new. I decided to try the Ken pattern by Berroco.

Finished Dread Pirates Gloves


Since the project turned out to be a surprising success despite all the warnings I heeded not, I named them the Dread Pirate Gloves.

I did have a few snags. The first few rounds on DPNs is a bear. There was no mention of how to add yarn when you move on to the next finger. I finally found a how-to somewhere online, but it didn't warn about it creating holes between the fingers. I found that if you thread the yarn through back and forth with a needle a few times before knitting there really wouldn’t be much of a gap. Don’t know if that’s the best way to do it, but they look good! And I learned it is much better to use the person's actual hand (if available) instead of the measurements in the pattern. The second glove is little wonky (one of his favorite words) because I failed to do this.

All in all, I enjoyed taking on the challenge of "the dreaded gloves," and Ben is pleased with his new gloves (and has been wearing his scarf all winter). I look forward to scaling more knitting mountains. :-)

Oh, a funny little bit! I finished all of this with two skeins. I really thought I wasn't going to have enough for the second glove so I went all over to find another skein. My Jo-Ann's was out of it, and I ended up driving 45 minutes to get a third skein. I never needed it. In fact, I had this much of the second skein left:

Left over!


So, for next winter, I think a matching hat?