Tuesday, August 27, 2013
Pin Win Birthday!
Hubby's birthday is the day after mine, so Monday this year, and he was all bummed that his birthday was going to be lame.
I have extra personal and vacation days, so I concocted a plan.
I secretly took the day off to bake a cake and cook him a nice meal. I picked some recipes from pinterest and even found a "from scratch" recipe for Funfetti (his favorite). (An all pinterest recipe meal could've easily been a fail, but I had read over the recipes ahead of time and felt certain that they would turn out at least okay.)
The pinterest board of recipes I used: Smashed Red Potatoes, Crusted Parmesan Zucchini, Confetti Cake and Balsamic Roast Beef.
I got up when I normally do to head to work after he does, started the crock pot and baked the cake. The first cake was burnt (my gas stove's fault, not the recipe's), so I cut the edges off and dumped in a bowl to maybe make cake pops later. The second turned out okay.
As I was washing the mixer to start the buttercream frosting, the water made a nasty gurgly noise and just up and quit! I run outside and lo, and behold, the water authority people are racing down our street to the bridge construction site. Seems the crew hit a pipe. I was without water until after dinner.
Fortunately, my friend was headed over right then so we picked up some spring water jugs and then she iced the cake for me while I worked on the dishes using a 2.5 gallon jug, and started the potatoes. (Meat and potatoes, my man.)
She left before hubby got home to a nicely set table and delicious aromas. I even timed it so that he could just zone out on the couch for a little while dinner was finishing up. I had a very happy hubby.
The recipes all worked out quite well! The roast was perfectly flavorful and tender. The zucchini and potatoes were cooked through perfectly. The cake was a little too dense for my taste, but still pleased all.
Sorry for the blurry cell pic. We were both quite hungry and in too much of a hurry to take a non-shaky photo.
Oh, and the cake:
He was ecstatic. This is a reference to one of his favorite shows, a British comedy called the IT Crowd about two IT geeks who work under a clueless manager.
Here's the clip:
Thursday, January 31, 2013
PinTesting- Crock Pot Teriyaki Chicken
In the meanwhile, I have been busy! And one of the things that has grabbed my attention is Pinterest. Yes, that's right. I don't know what took me so long. Long before Pinterest, I kept a Google notebook (when it still existed) of DIY blogs and articles to try someday. This does just that but in a beautiful, visual way that really works for me. And while it is totally unoriginal with such awesome blogs out there as Pinstrosity, I thought a good way to keep up with blogging would be to recount my attempts at actually doing some of those Pins.
So, first up, we have Slow Cooker Teriyaki Chicken from Easy-Cookbook-Recipes. I'm always a little dubious of crock pot recipes. Experience tells me that just because you slow-cook something, doesn't mean it will come out tender. Often, I ended up with dried, tough meat with not a lot of flavor. Besides which, the photo doesn't really look like whole chicken breasts were just placed in a crock pot. It looks like the chicken was cut and pan fried in the sauce instead. But, this recipe included a good amount of Apple Cider Vinegar, which I figured would really help with making the meat nice and juicy.
And boy, was I right!
Now, when I got home from work, the tenderness of the chicken did appear questionable as the outer skin looked hard and dry. So, I did what any sensible cook would do and poked a chicken breast with a knife. After the initial cut (a little tough), it melted right through.
And here is where I differed from the original recipe. Rather than waste a pan on boiling the sauce, I broke apart the chicken right in the crock pot, mixed it up a little and set the crock pot on high for about thirty minutes. I did add some cornstarch and water, but didn't really find a noticeable difference in the consistency, nor did I care to. We like our sauce runny so we can mix it well with our starch.
I served it atop Uncle Ben's "Asian Style" rice with some extra frozen peas thrown in. I consider this the best tasting and simplest attempt at Asian food I've come across yet. It may not be true Teriyaki, but it's a lot better than Iron Chef's bottled sauce and I'm really pleased.
The husband said, and I quote, "I would definitely eat this again!" That, my friends, is a winner.
Tuesday, May 29, 2012
Frankinsteined Paisley Purse
{Picture to come?}
This determinism and stubbornness later came to manifest itself in a desire to alter patterns. I wanted that dress body with that dress sleeve and so on and so on.
At one point I convinced my 4-H leader that I could make a lined dress sleeveless (the seams of the lining would been inside the sleeve) and we were able to figure it out.
As it turns out, this strange determination and desire to do things differently worked out for me. When I sewed my Adelaide dress, I had to do some major reconstruction to the bodice in order to accommodate my body type. And in truth, I really enjoy the challenge.
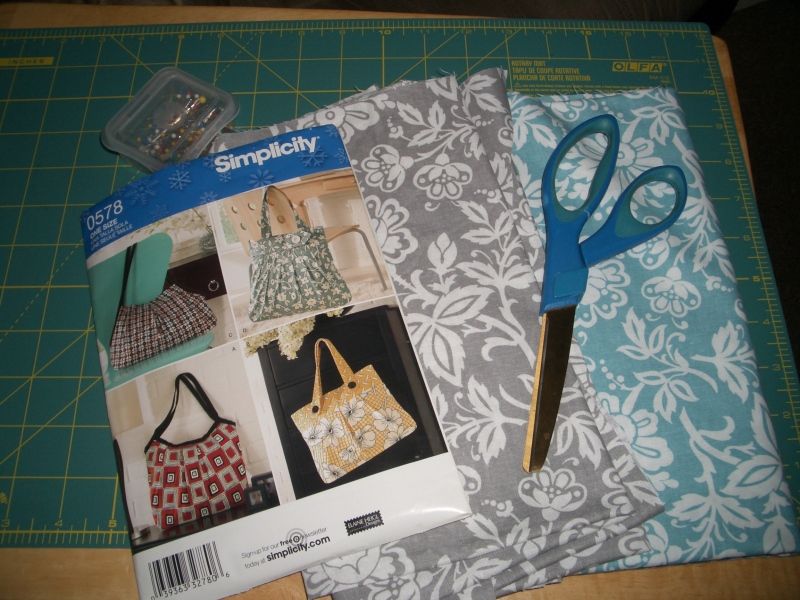
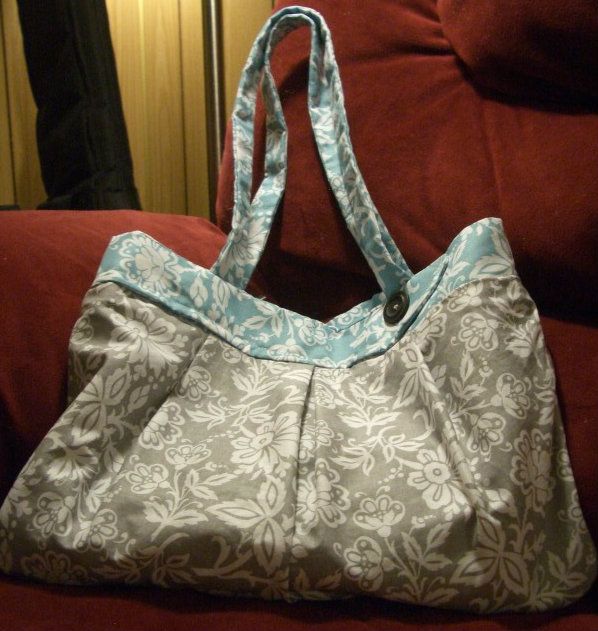
Now, this purse didn't need any changes, however, I really liked the tab style band of bag B, but didn't want another large tote, so I used the band and straps of bag B with the body of bag D.
(My pattern says it is 0578, but it has snowflakes on it, so I think it was at one point a holiday special or some such business. 2685 is the number you would look for on the Simplicity website or at your local big box store.)In fact, the reason I had set out to sew my own purse in the first place was because my three options have been:
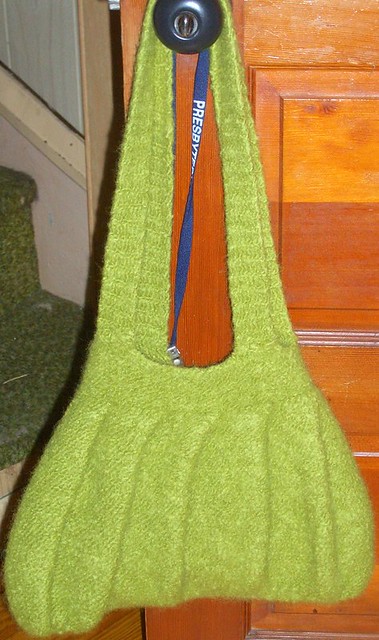
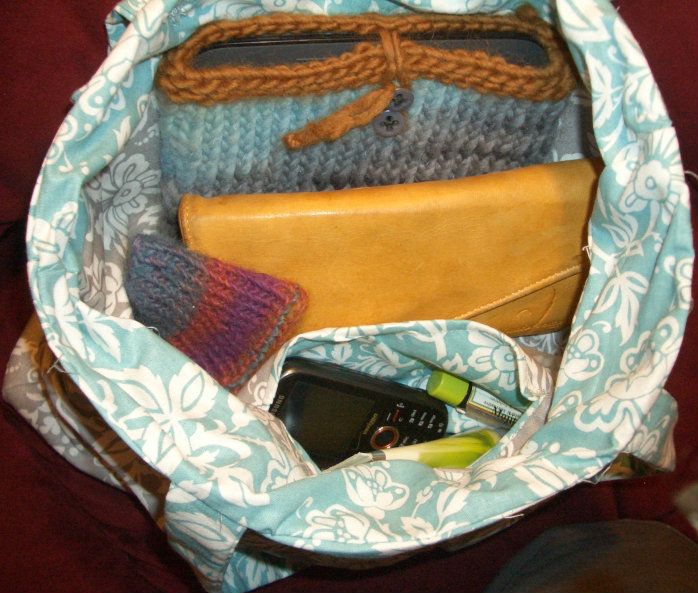
-A hand knit and felted wool bag that has simply been too hot for the warmer months.
-A large brief-case type bag that I got for trips so I could easily carry my netbook with me. Since it has warmed up, I've been lugging this around everyday.
-And a small clutch that won't even allow me to carry the gorgeous deer-skin wallet my grandparents gave me from a deer my grandfather had shot.
I needed something light and medium-sized for the summer. So, I set to work.
I chose to do a similar fabric pattern in contrasting colors.
All in all, I think it worked out well. You can't see it well here, but the tab isn't quite right. The top of the "arrow" is cut off, but that has nothing to do with grafting the two bag pieces together. I read and re-read the instructions and I can't see how they do it as indicated in the pattern without cutting off the top of the arrow like that. There really wasn't enough of a seam allowance to make up for what is lost in turning the band and band lining. There was one other point in the pattern where I read it over and over again and couldn't understand how they were accomplishing what they were indicating. So, I just trucked on and made do.
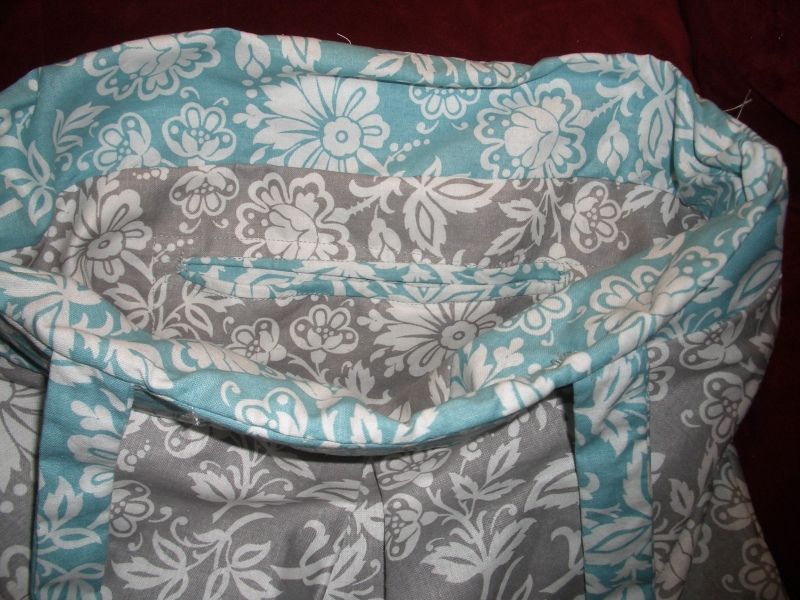
The only other change I made was to do away with the inner pocket zipper. Instead, I made the inner pocket the contrasting color and sewed it so that a little bit of it would be peaking out as a trim around the pocket.
(Please excuse the threads peaking out. I did trim those after taking these photos.)And it is the perfect size for all my everyday needs.
Wednesday, October 26, 2011
Failures and Triumphs
First off, I have failed my own challenge. I did make one top and one dress. The button on the top fell off after one wear (and I'm not much a fan of it, anyway) and the dress is lovely. But I have yet to procure photographic proof. I'll get on that.
Also, I wound up buying more fabric. With a garment in mind....but I've hardly made a dent in my current stash. I did manage to weed out the "grandma fabrics" as Ben so lovingly calls them and plan on donating them to my local 4-H for their fabric sale. (Ironically, I'm fairly certain that I bought most of those fabrics at the 4-H sale.)
And the last bit of my failure is that I bought a few sleeveless blouses in the summer. The A/C in my car was dead and we were in the middle of a heat wave. The best option, it seemed was sleeveless blouses with a light short-sleeved cardigan for the office. That way I wouldn't completely melt on my way home. I simply didn't have the time, but I did however, have a 30% off coupon for Kohl's. And I did end up mending what I bought to fit me right.
Now, that isn't to say that I haven't been crafting away.
I am especially proud of this tea tray that I customized for my dear BFF and her new husband. They are both music geeks, even more so than I. (In fact, the groom was a member of the YellowJackets, who are doing a smashing job on the Sing Off right now. You should really check them out.) And they love tea. So I wanted to make them a literal tea tray that featured their love of music.
The tray is from Target and beautiful as is. I printed out some favorite musical pieces, soaked them in tea, and baked them a little. Then I tore them, laid them out and Mod Podged the heck out of them.
They were ecstatic. I failed to photograph the finished product myself, so I borrowed the bride's own picture.
Now, I shall get back to my Christmas present knitting (I am as pleased as a peacock, but I can't show off!) and pattern design testing. I also have some painting projects underway that I should be able to share soon.
Thursday, May 26, 2011
Adding a little color
Now on to my color problem.
Don't get me wrong, I love a good white blouse. Crisp whites are so lovely, especially in the summer. At some point, it was at a picnic I believe, I spilled some barbecue sauce on this beautiful white sleeveless tunic:
It is hard to see in this picture, but there is a little yellowish spot on the right side under the "sun." (In my kitchen, everything has a yellow tinge to it, but it is the best lighting in the house for pictures.)
I've also had this nice little kitchen mat for about 4 years. No matter how much I cleaned it and sprayed it with stain remover, the dirt from feet would not go away.
Thank Heaven for RIT Dye. (And inexplicable clearances! I bought this Navy Blue for $0.45 one day at the supermarket.)
The instructions were simple and the results were fabulous.
(I promise, a pic is coming soon with me actually wearing it.)
And well, it stills has some dark spots, but they don't look like dirt so much as a change in saturation of color. I'm pleased with it. It goes with our blue glasses, too!
I think I've becoming addicted to dyeing... You can check out my forays into dyeing yarn with tea and kool-aide here on Flickr, or here if you are on Ravelry!
Thursday, April 21, 2011
Rosie Riveter Dress
I don't know why, but this dress reminds me of Rosie the Riveter. Maybe it's the plaid. I bought it for under $5 at the Salvo (see below). All it really needed was a higher hem line and a better belt. I found the belt on clearance at Wilson's Leather for $6 and I can use it on other outfits.
Technically, I believe this fits into my "Make it Work" challenge because I bought the dress and belt back in December and just never got around to it until now.
Wednesday, March 30, 2011
Make It Work Challenge
I don't have an easy body to shop for. Which is what I love the most about sewing. Which is why I have a drawer overflowing with fabric and 2 dozen patterns. That I haven't been using!
I've also been stuck in a materialistic rut of sorts. I think the solution might be to lock down my clothing budget to a minimum and to force myself to create with what I have on hand.
So, I'm starting a Make It Work Challenge for myself and anyone who wishes to join me. I've seen others out there do something along these lines, and I love it.
[Incidentally, I'm fairly certain I used this book in 4-H when I was learning to sew.]
Here are my rules:
1. Avoid buying new clothes. Force myself to get creative and savvy. Besides anything I make will fit so much better. This will also force me to improve upon my seamstress skills. Maybe I'll finally take that leap and sew my own swimming suit (one of the most difficult garments for me to find).
2. Avoid buying new fabric or patterns. Use up that stash! Save your JoAnn's coupons for quality notions and all the thread you'll be needing.
3. If I MUST buy a garment, get rid of something! This will help me get rid of the old, worn out clothing and help keep garment clutter to a minimum. I can either donate, or use the fabric to make something else.
Not only will this improve my wardrobe and barely effect my wallet, but it will keep me blogging. And if you don't see posts from me, bug me! Let's work together to keep each other crafting.
And hopefully, this whole project will make me more thankful for what I already have.
I'm in for a year, how about you?
Monday, January 24, 2011
Birthstone Nest Pendant
You may well remember back when I tried to duplicate the ~Ruffles and Stuff~ Family Tree Brooch/Pendant. The gift was well received, but I thought that the tree was a little too big especially for the petite women in my family that I wanted to give it to for Christmas.
So, I put my thinking cap on. And maybe it is because of the name of my blog, but I thought of bird nests and using the beads as eggs! I'm sure it's been done before, but even so I thought I'd share with you how I did it.
Supplies
Ignore the glue gun! That was a proto-type. Hot glue and wire don't work together, it seems. However, you will want to gather:
-Wire cutter and needle-nose pliers
-Beading wire in your choice of metal
-Chain necklace
-Beads in the children's birthstones (Pictured here are Peridot/August for myself and Aquamarine/March for my brother)
I bought the beads at AC Moore. They have a large selection of beads in plastic tubes that are decently priced.
First, I strung on the the two beads onto the end of a piece of wire, and started coiling the wire around. If you look closely at the bottom of this picture, I think you'll get what I mean:
I continued that until I felt the nest was big enough. Then, I brought the wire up to the top of the nest and wrapped it around the nest a few times and then looped it through a chain on the necklace before snipping it and tucking it in.
Voila! Easy peasy.
Monday, December 6, 2010
Adelaide
Guess how much she cost me?
$4.00 for fabric on the last day of the 4-H fabric sale
$1.00 pattern (Jo-Ann's sale)
$2.00 for interfacing
$3.00 for thread
Comes down to a total of $10 for a tailored dress. Not bad. :-)
I've wanted a red dress for the longest time, and now I have one.
Before I go, I just wanted to share a close up of the pleated sleeve. I love these kinds of sleeves. McCall's did a nice job with this pattern.
Next up, my pleated purse with a customized liner.
Sunday, October 31, 2010
Harvest Tortellini Soup
This recipe is one that I just whipped up at the beginning of the month to use up what was left of my tomatoes. In late September, I pulled all the green tomatoes and put them in a big, brown paper bag in a cool dark spot. I wasn't sure it would work, but they actually ripened. And not so quickly that they rotted, either!
Then, when they were ready. I peeled and sliced them. If you haven't done this before, it is surprisingly simple! It was my first time trying this, and I was pleased. Bring a large pot of water to boil, with a dash of salt. Then, dunk the tomatoes in for 30 seconds and place them in a large bowl. Do not put them in cold water or on ice. Just let them cool. The skin peels off so easily!
Ok, now, to the recipe. As usual, I made this "dutch" so you could alternate it as you like.
I used:
About 10-12 medium sized tomatoes, peeled and cut into medium pieces
Large handful green beans (frozen or fresh)
Large handful sliced carrots (frozen or fresh)
1 whole zucchini, sliced
2 cans Veggie broth
Half cup of chopped onion
About 6 oz. of cheese tortellini*
Olive Oil
Shake or two of preferred Italian spices, to taste**
*I actually used a little more than half of a 12 oz. package. If I don't stuff the soup with tortellini, Ben will put all the tortellini in his bowl, and I will get about three. :-)
**My spice rack actually came with a jar of Italian spices that contains basil, thyme, oregano and marjoram.
First, I cooked the veggies in the bottom of a large pot with olive oil and spices. I added the tomato last...about right when the rest of the veggies were ready.
Then, I added the broth and brought it to a boil. Once it was boiling, I simmered it for about 20-30 minutes until heated throughout. You can add a teaspoon or two of tomato paste here, to thicken it if you like.
That's all folks! Goes great with tuna sandwiches. :-)
Monday, September 13, 2010
Summer projects
I called it the Mariner's knot scarf because he really likes to take his boat out on the lake with the entire family.
Here's a close up of the knot-pattern:
The knot was a little difficult to work with at first. If you use this pattern make sure to make all of your knit rows loose! Otherwise you won't be able to get the needle through three stitches three times in the next row. Once I figured that out it was a breeze to knit.
Also, for the cast-on method I found this video very helpful:
She goes nice and slow so you can actually see what she's doing. :)I like this method for casting on bigger projects. Once I learned it, it went by so very fast! Though I did not do the correlating bind-off, and you really couldn't tell.
My other project, when it was way too hot to knit with wool was this neat little tea wreath:
(Please excuse the glare... the lighting in our home is a bear to work with).
I had been trying to come up with a better way to offer the variety of tea I have to guests. Flinging open the cabinet always kind of intimidated them, and all the tea was high above the stove. Kojodesigns solution works out perfectly. I put the rest of the tea bags in little baggies in a drawer. No more boxes filling up my cabinet! Which is nice, since our kitchen is very organizationally space challenged.
Ok, I've rambled on enough. I am working on some Christmas projects that I'll have to wait to share. But I also just got a dress-form, so look forward to some sewing projects coming up!
Thursday, August 26, 2010
"New" Shoes
So, I decided on a whim to see if I had any fabric paint that would work. Lo and behold I just happened to have a pearly white and pink. I also had on hand a jar of buttons, which included some cute little green ones. I really wasn't sure about painting faux leather with fabric paint, but I figured I couldn't end up with worse than I had.
Here is the end result:
I was pretty pleased with them, and I got several inquiries as to "Where did you get your shoes?"
Friday, June 25, 2010
Wednesday, June 23, 2010
Family Tree Pendant

I fell in love as soon as a I saw ~Ruffles And Stuff~ family tree brooch/pendant. So much so that I dove head first into wire jewelry making.
I made this for Ben's sister Suzie and I'm so glad that she loves it.
It was a fun, meaningful gift to make, and I don't feel so shy about jewelry making any more.
Monday, May 17, 2010
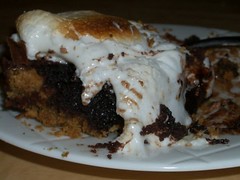
S'More Brownies, Please!
So I created this:
We'll be camping with friends again around July 4th, so I'm sure I'll do it again. Then, maybe I'll have pictures to add to the tute. But here's the breakdown:
Graham Cracker Crust
1) Crush graham crackers. About one sleeve did it.
2) Melt butter- 6 to 8 tbsp depending on your preference.
3) Combine and line bottom of your cake pan.
Brownies
1) Break up 1 Hershey bar into small pieces.
2) Mix brownies as directed, adding pieces of chocolate bar.
3) Pour over graham cracker crust.
4) Bake in oven as directed
Marshmallows
Now, my stove has a broiler underneath that works really well for this. I simply lined the top of the brownies with marshmallows, turned the broiler on and put them in just long enough to brown the marshmallows (it's really not long!).
Otherwise, you could probably remove the brownies a few minutes before they are done, place the marshmallows and put them back in the oven.
Enjoy!
Monday, April 12, 2010
Sticks & Stones Scarf and the Dread Pirate Gloves
My husband likes different. And I can't blame him. I wouldn't want a plain old boring black pair of gloves and scarf either. And that's mostly what is out there for men. But this past winter was freezing, and even winters before I couldn't bear seeing him go out without a scarf and gloves. So we picked out this fun (yet subtle) Sticks and Stones yarn by Caron Simply Soft Paints.
I started with the scarf, the basic Ribbed scarf pattern from Deb Stoller's book. I opted to use size 13 US needles instead to give it a kind of lacy openwork kind of feel and made it plenty long for him to wrap around several times.
Then he asked me to make gloves. His scarf was only my second project, so I said, wait and we'll see. Everyone I had ever talked to said to stick to mittens or fingerless gloves. Gloves sounded horrible! Well, here's a little thing about me. I don't tend to stick to what people recommend and I always like a challenge. So after knitting the booties (see previous post), I was ready to try something new. I decided to try the Ken pattern by Berroco.
Since the project turned out to be a surprising success despite all the warnings I heeded not, I named them the Dread Pirate Gloves.
I did have a few snags. The first few rounds on DPNs is a bear. There was no mention of how to add yarn when you move on to the next finger. I finally found a how-to somewhere online, but it didn't warn about it creating holes between the fingers. I found that if you thread the yarn through back and forth with a needle a few times before knitting there really wouldn’t be much of a gap. Don’t know if that’s the best way to do it, but they look good! And I learned it is much better to use the person's actual hand (if available) instead of the measurements in the pattern. The second glove is little wonky (one of his favorite words) because I failed to do this.
All in all, I enjoyed taking on the challenge of "the dreaded gloves," and Ben is pleased with his new gloves (and has been wearing his scarf all winter). I look forward to scaling more knitting mountains. :-)
Oh, a funny little bit! I finished all of this with two skeins. I really thought I wasn't going to have enough for the second glove so I went all over to find another skein. My Jo-Ann's was out of it, and I ended up driving 45 minutes to get a third skein. I never needed it. In fact, I had this much of the second skein left:
So, for next winter, I think a matching hat?
Friday, March 12, 2010
Snuffleupagus Booties
Easy they indeed were and they are definitely warm, but they are rather unshapely. That along with the texture of the yarn reminded me of Mr. Snuffleupagus from Sesame Street. I don't know. What do you think?
These aren't actually the ones I made for her. I made these for my mother-in-law for her birthday. The first one's were really unshapely, so I used less stitches so that they wouldn't be so wide. But I'm still not thrilled with the end result.
Update: she loved them and kept remarking how adorable they were. :-)
Monday, February 22, 2010
Hullo
So thank you for stopping by and hope that you will be coming again soon to see what I have been whipping up.
~Lidi Di